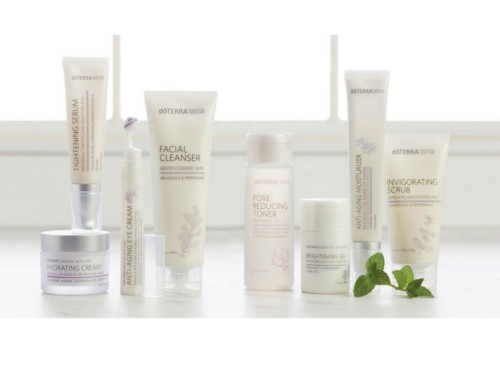
Homemade Diaper Ointment

This recipe has been adapted slightly to fit my needs. I discuss the changes I made in the notes section below. It comes from the Herbal Academy of New England class I am taking!
Treatment
This easy and quick recipe (I promise!) is a nourishing, soothing skin ointment that treats diaper rash. It keeps the skin dry and is also antibacterial. Comfrey root grows new tissue on the surface of the skin. Chickweed, marshmallow root and comfrey root all contain large amounts of calcium. Goldenseal powder is a topical antiseptic.
Use
Apply this ointment to diaper area after changing. Use liberally. If there is no response after three or four applications, other factors such as diaper disinfection (for cloth diapers), a change in diet, and or skin disorders should be considered.
Recipe
1 tablespoon chickweed
1 tablespoon marshmallow root
1 tablespoon comfrey root
1/8 tablespoon goldenseal or barberry root powder
1 cup almond oil
¼ cup beeswax pastilles
8 drops lavender essential oil

Directions
- Place sweet almond oil in a pan with the herbs
- Gently heat for five to 10 minutes, be careful not to let the herbs scorch or burn
- When mixture is hot, add the wax and allow it to melt
- After wax is melted, strain mixture through cheesecloth in a bowl
- Pour from bowl through a funnel into a jar with a tight fitting lid
- Add lavender essential oil drops
- Label the jar
- Place in fridge until mixture solidifies
- Store away from heat near infant’s changing area
- Discard used portions after two months (Hoffman, 480)
Notes
I was excited to make this recipe because my 17 month old goes through a lot of diaper ointment! It only took about 20 minutes from start to finish and the actual “cooking†was simple and short.
I had some of the ingredients on hand already, some I had to buy. I couldn’t find barberry root powder anywhere so I went with the goldenseal root powder. Just a note so you aren’t surprised: it is pricey for just a small amount!
When I began to heat the mixture of herbs and oil, it smelled slightly woody. I started it off on a level six on my stove (just slightly above a medium heat). As it warmed after about two to three minutes, I turned the heat up to an eight (just slightly below a high heat). When it began to bubble ever so slightly, at about the ten minute mark, I added the beeswax. It is easier to use pastilles when making recipes like this (rather than a block of beeswax that needs to be shaved) because the wax is already broken into small bits and can be easily poured and stirred. It also melts quickly this way! When I added it to the oil and herbs it took less than a minute to melt completely. I was constantly stirring the mixture. The whole thing smelled lovely when the beeswax was added!

Once it was all mixed together, here is where I deviated from the original recipe slightly. The original recipe called for pouring this mixture right into a jar that was covered with cheesecloth. I chose to pour it through a strainer lined with cheesecloth into a bowl. Then I poured the mixture from the bowl, through a funnel into the smaller jars. It would have been too hard for me to pour directly from the heavy skillet into the small jars. The jars are actually canning jelly jars. It all had to be done quickly because once the mixture comes off the heat of the stove, it begins to solidify. (Not right before your eyes, but within a few minutes.)

Once the mixture was in the smaller jars, I added four drops each of the lavender essential oil.
When I used it on my son, it worked great! This alternative to store bought diaper ointment is a keeper in my household! If you are interested in using this ointment but are too busy to make it, or maybe a bit intimidated about making it on your own, you can buy it in my online shop! Click the photo to take you to the listing!


Leave A Comment